Working with ODIS ENGINEERING
ODIS E main functions
Below is a description of ODIS Engineering (ODIS E) menu items. Numbers match the program interface.
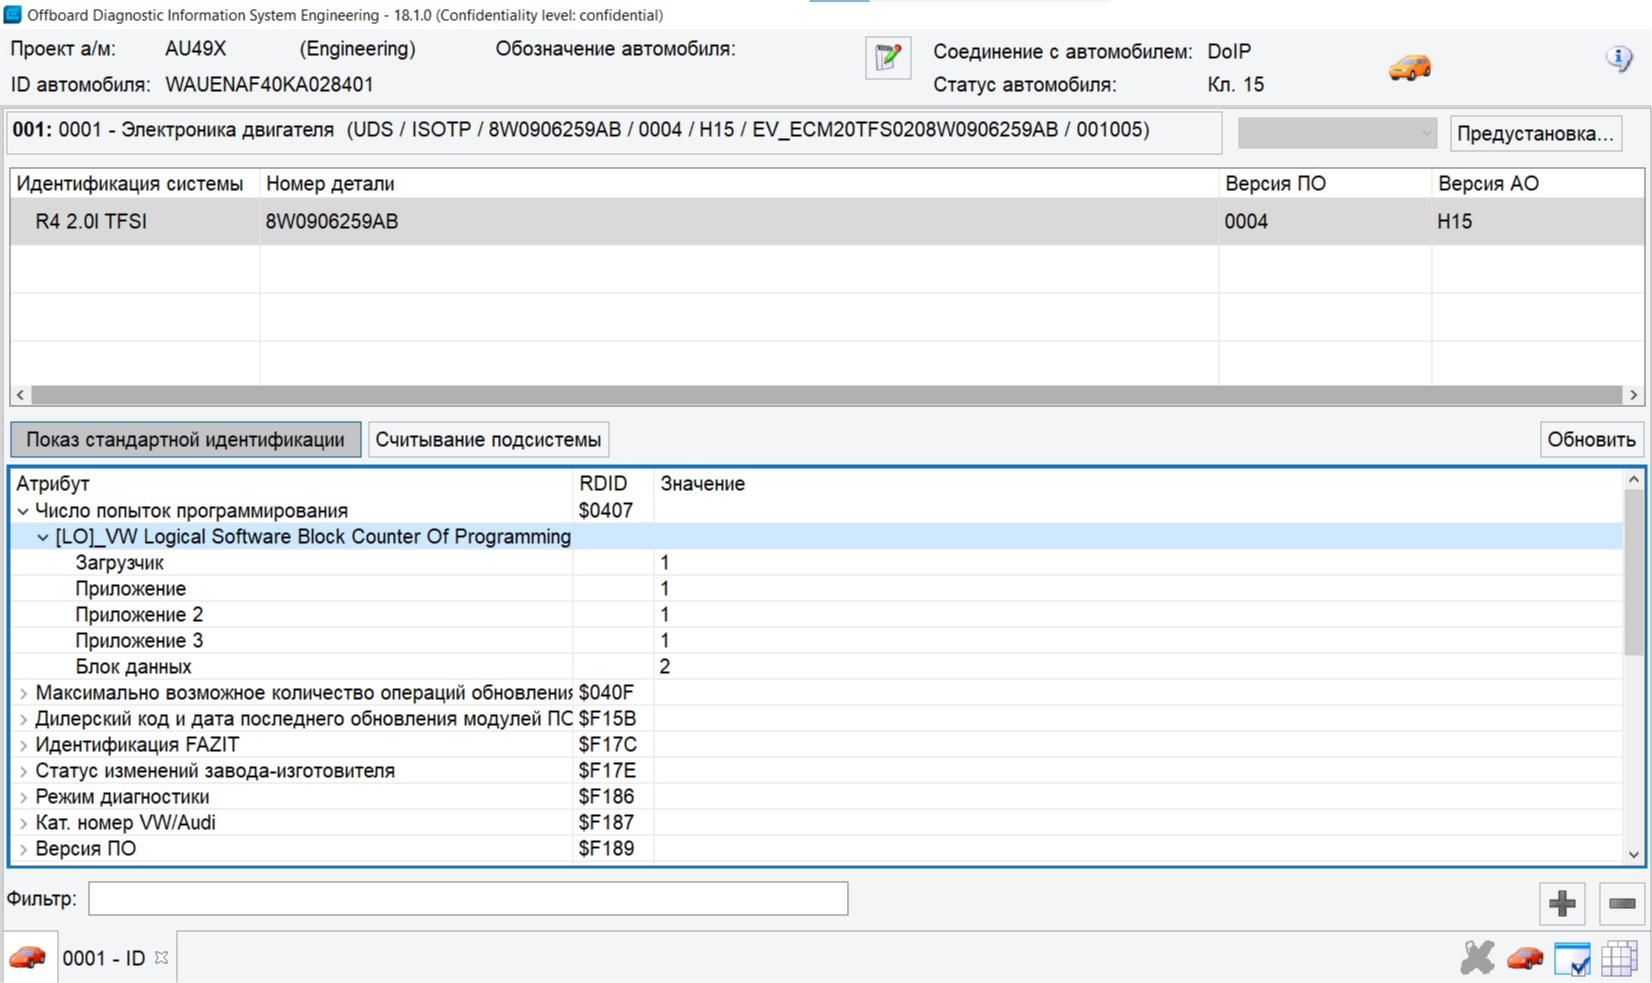
001 — Identification
View basic ECU information: hardware and software versions, part number. Click Show extended identification for additional parameters, such as the engine ECU flash cycle counter and others.
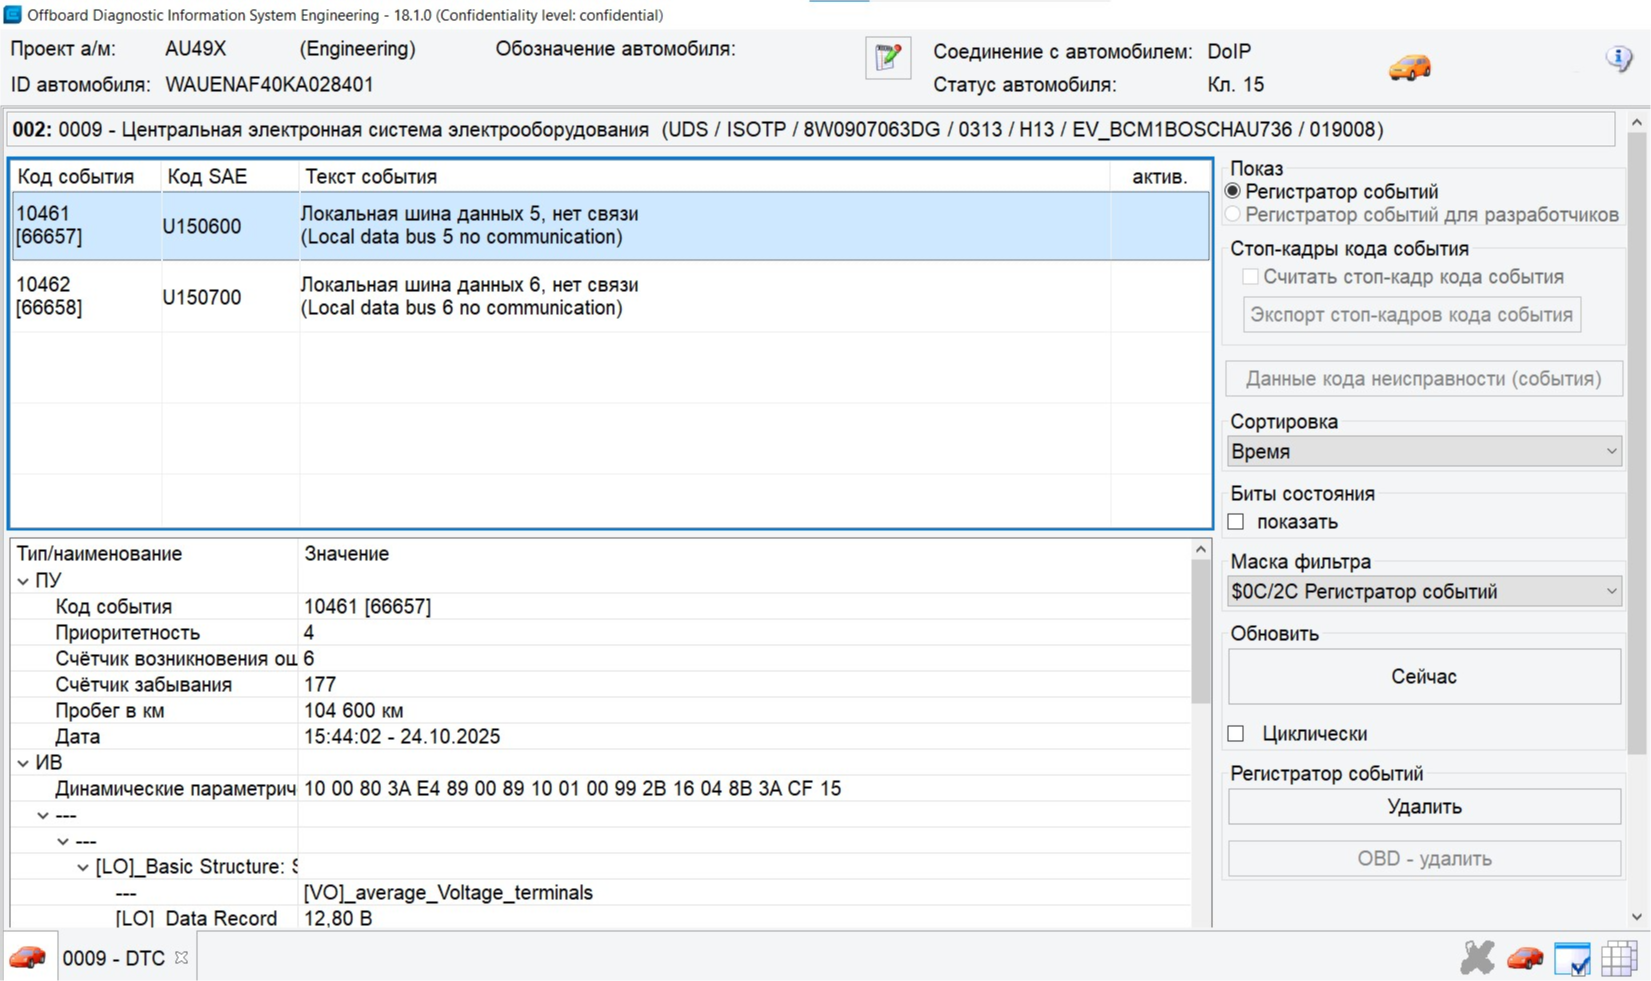
002 — Event memory
All stored fault codes (DTCs) are shown here. For each entry you can see details: trigger conditions, mileage, and status. Faults are also cleared from this screen.
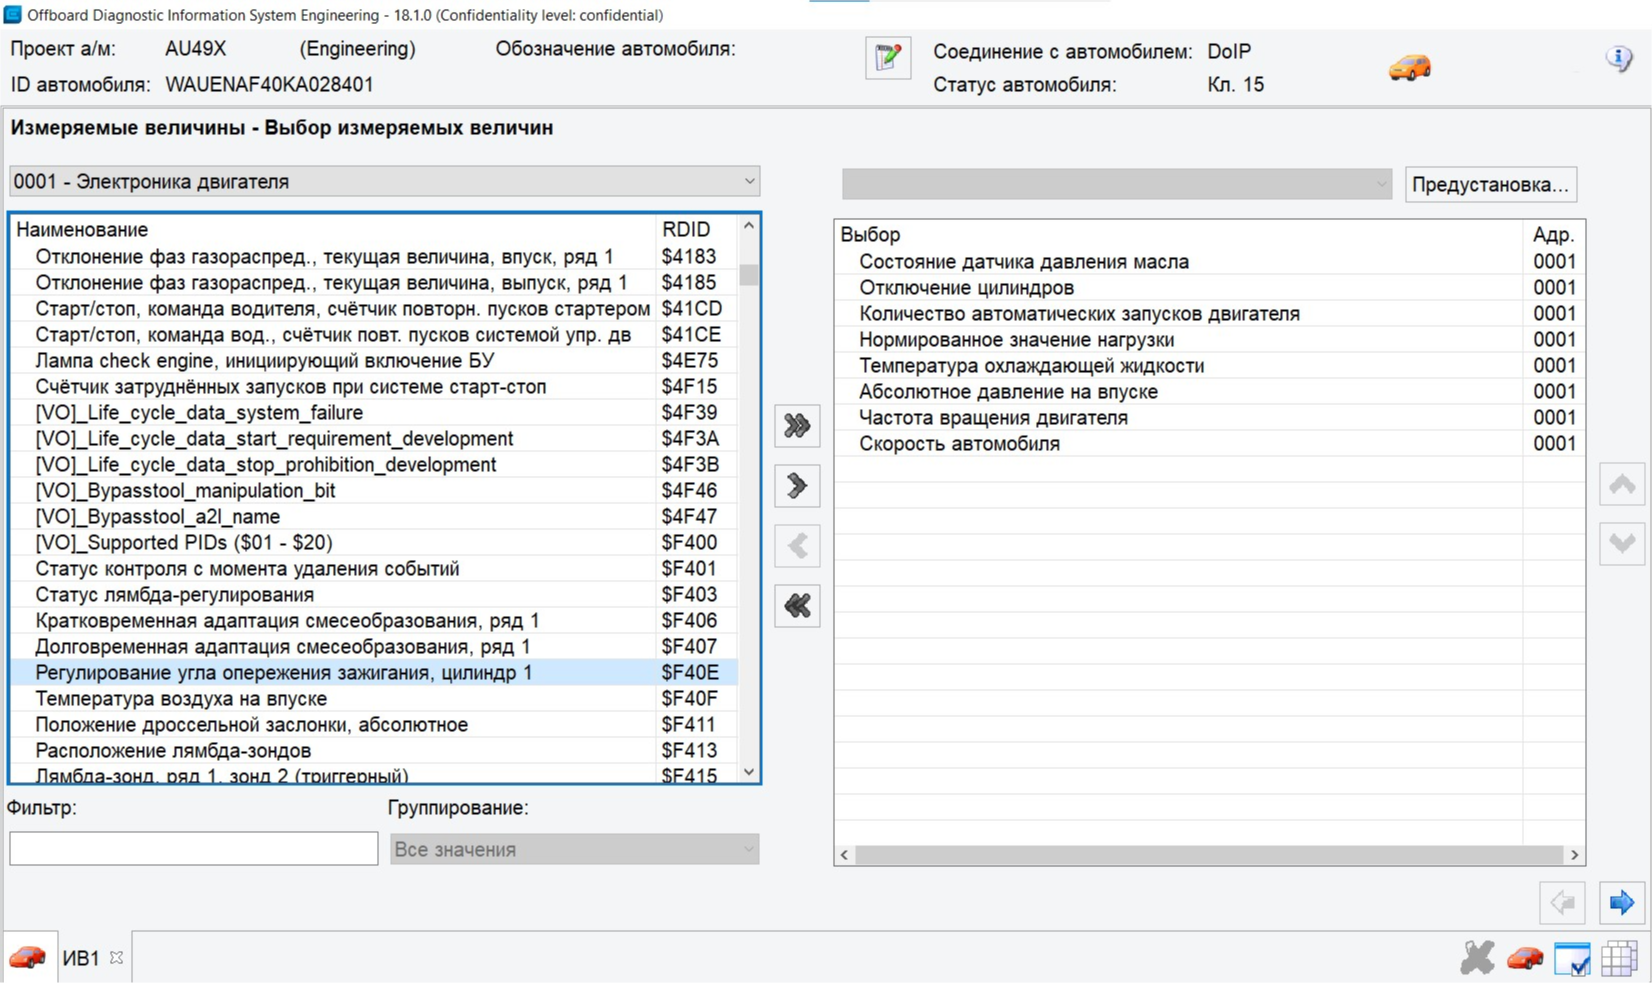
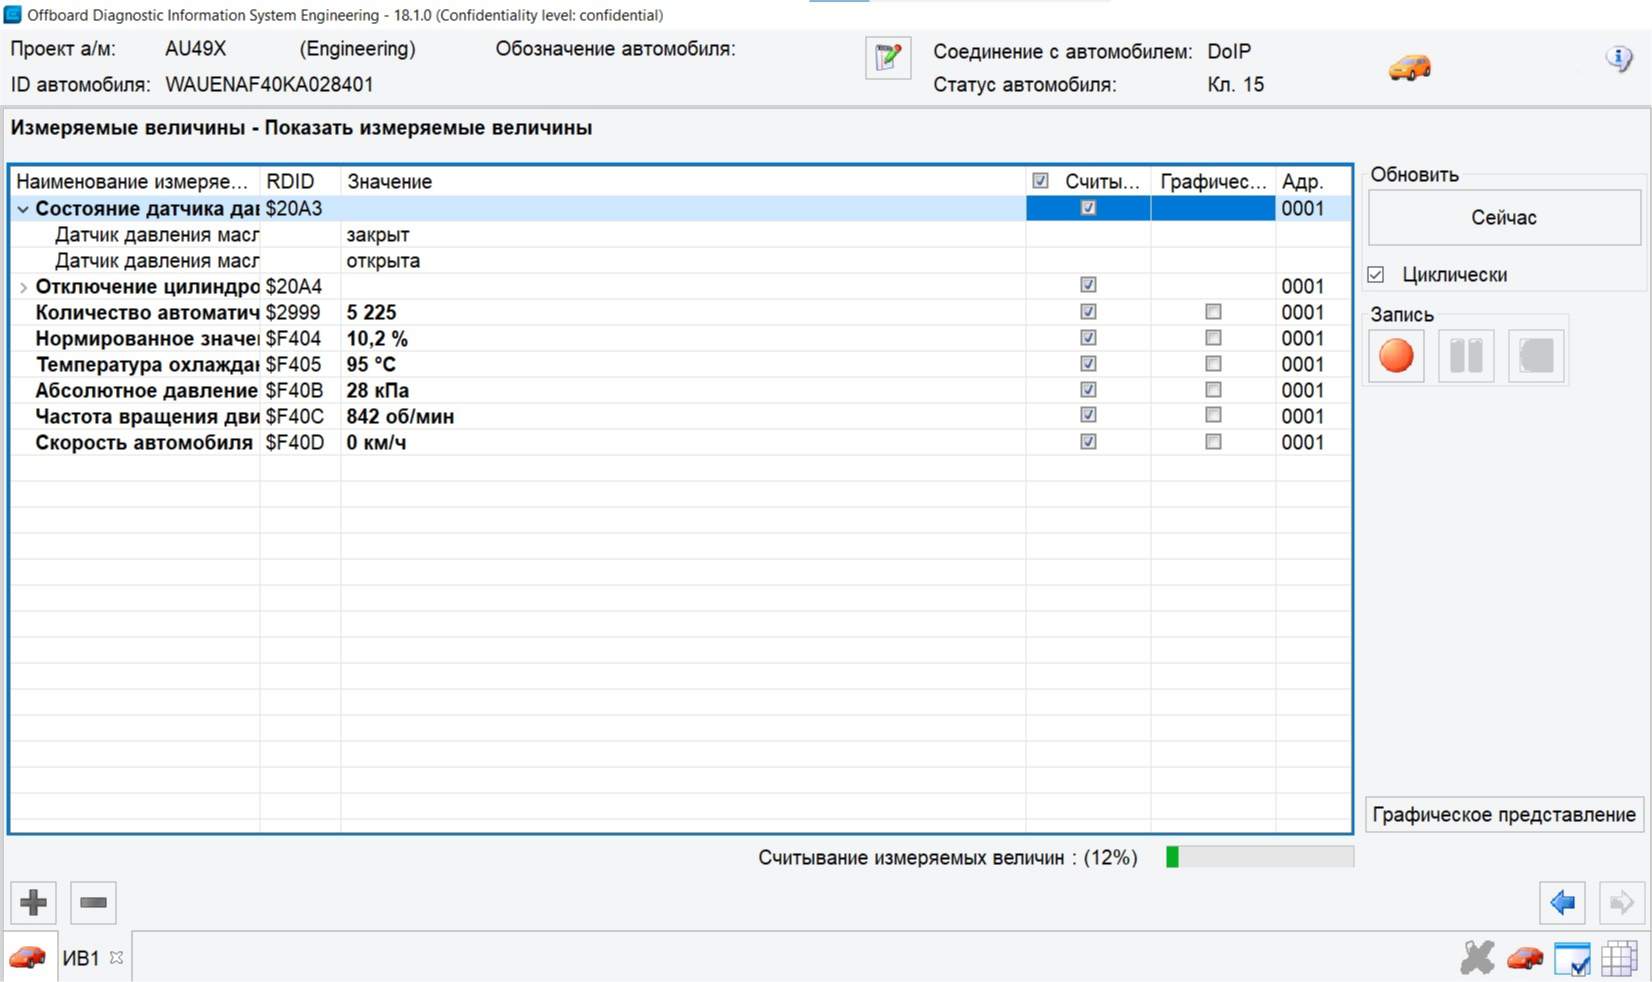
003 — Measuring values
Real-time parameter monitoring (engine speed, temperatures, pressures, etc.). Add parameters to the list with a double-click, then start display with the blue arrow to the right.
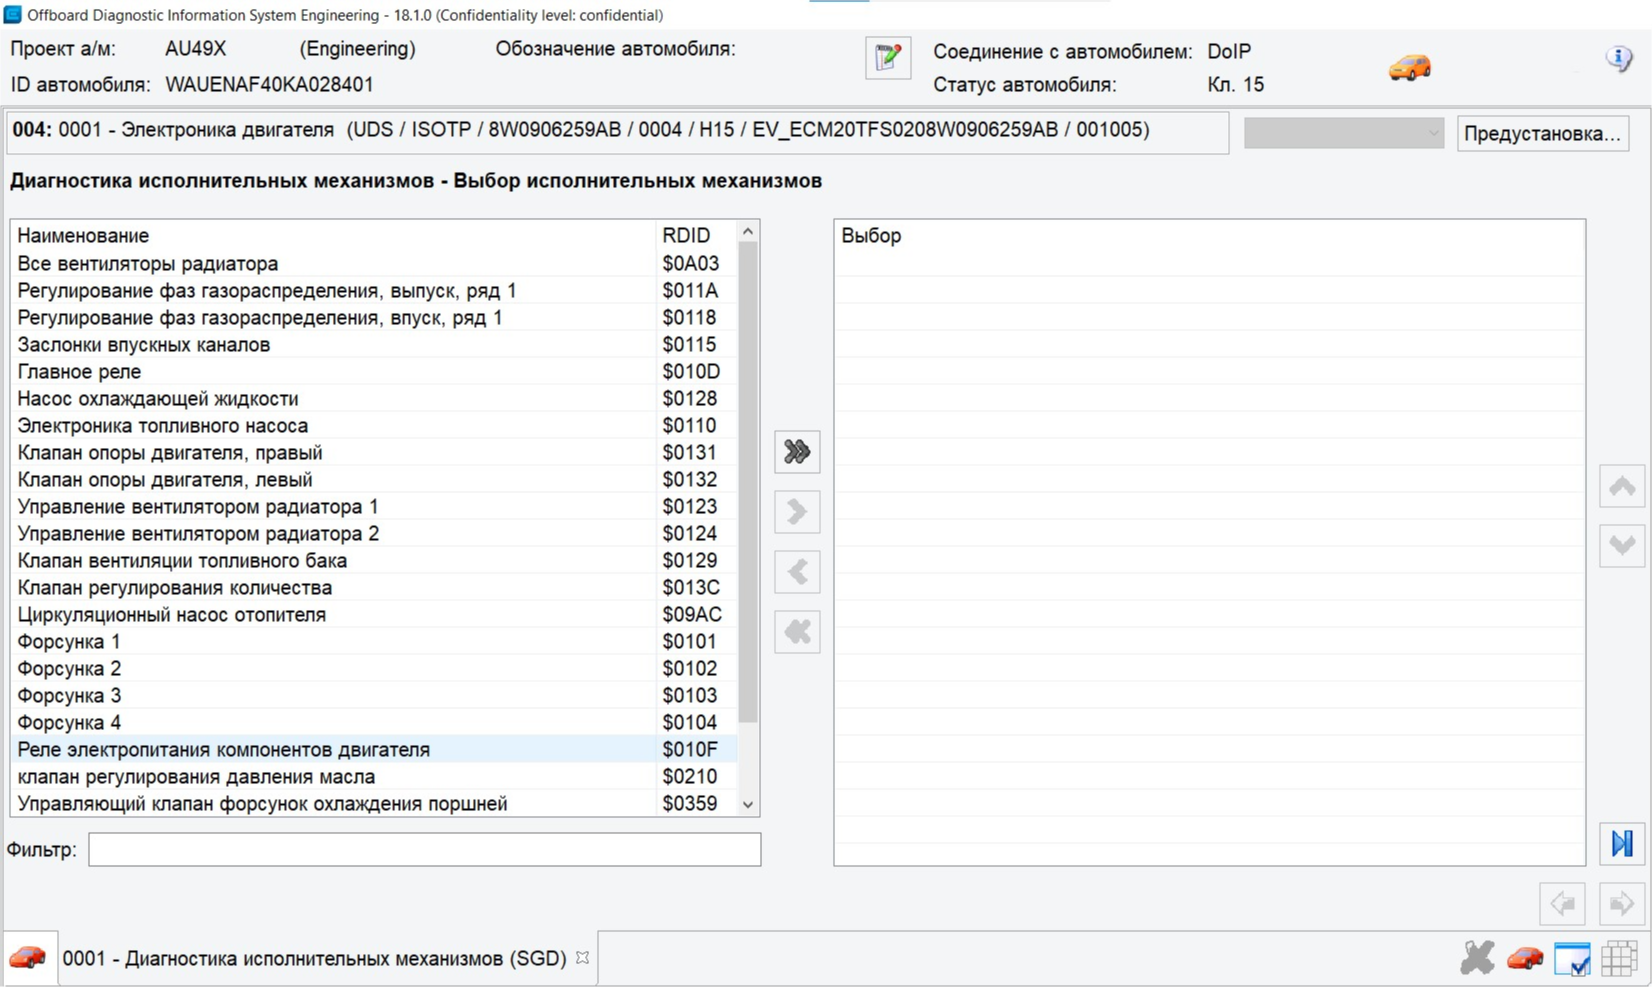
004 — Actuator diagnostics
Runs a standardized test by activating selected actuators controlled by the chosen ECU. Helps verify mechanical operation.
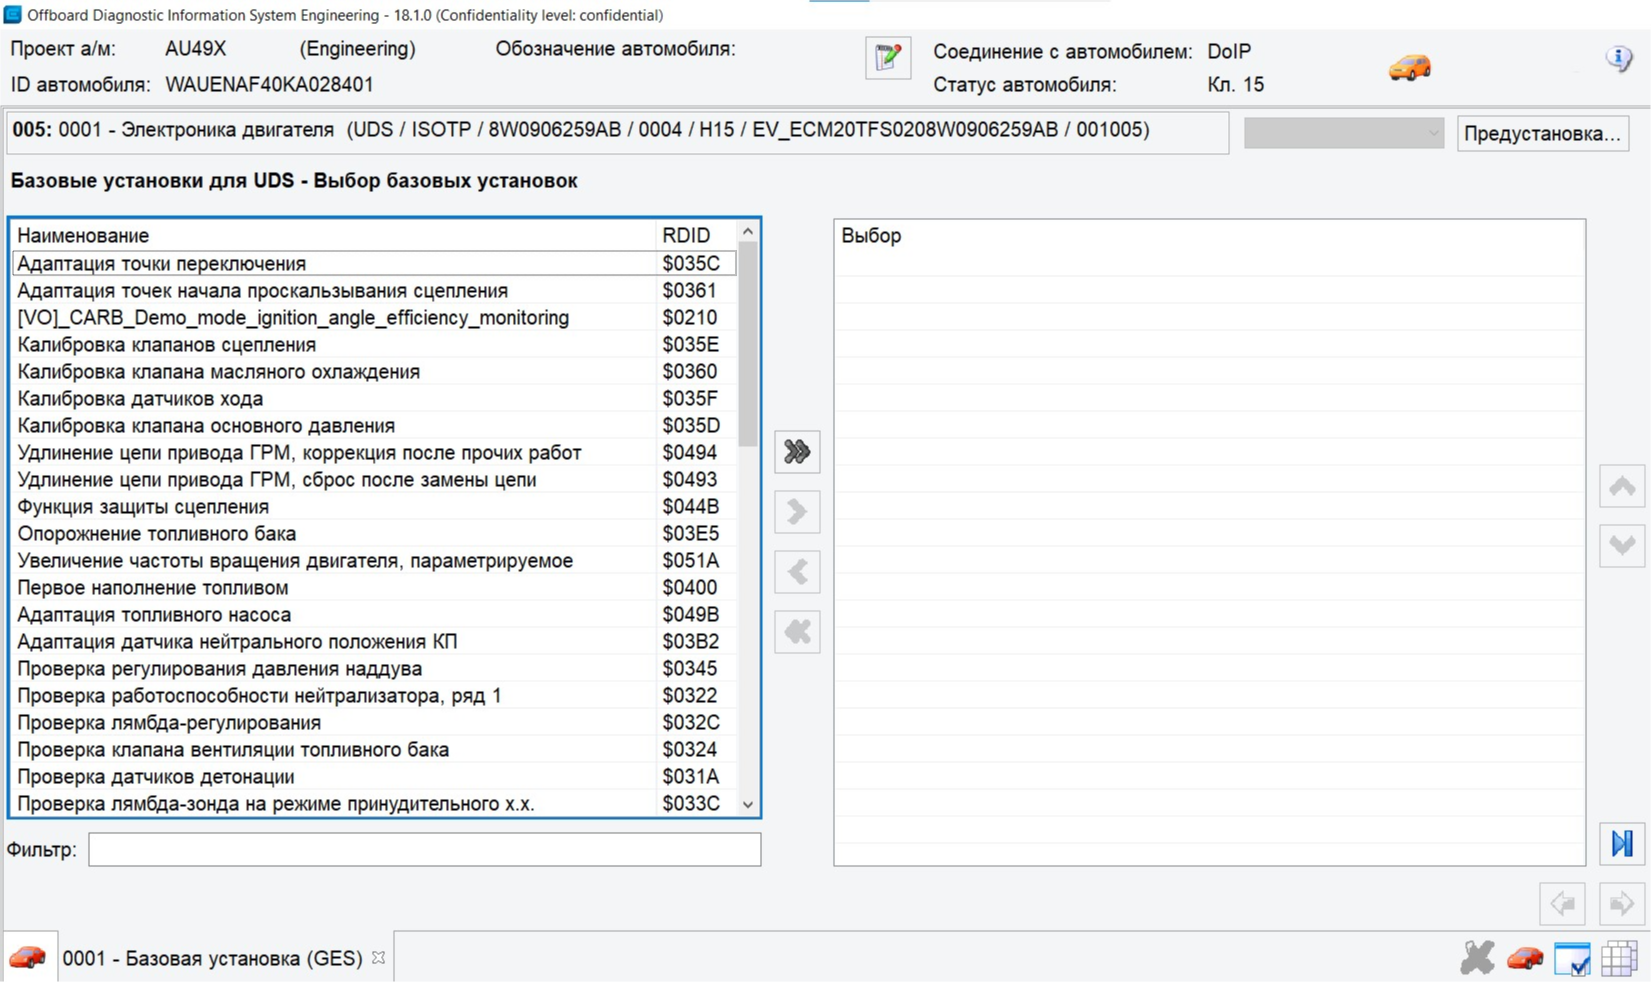
005 — Basic settings
Service function that puts the ECU into a special mode for calibration, learning (e.g. climate flap positions), or component initialization.
006 — Coding
Turn vehicle functions on or off.
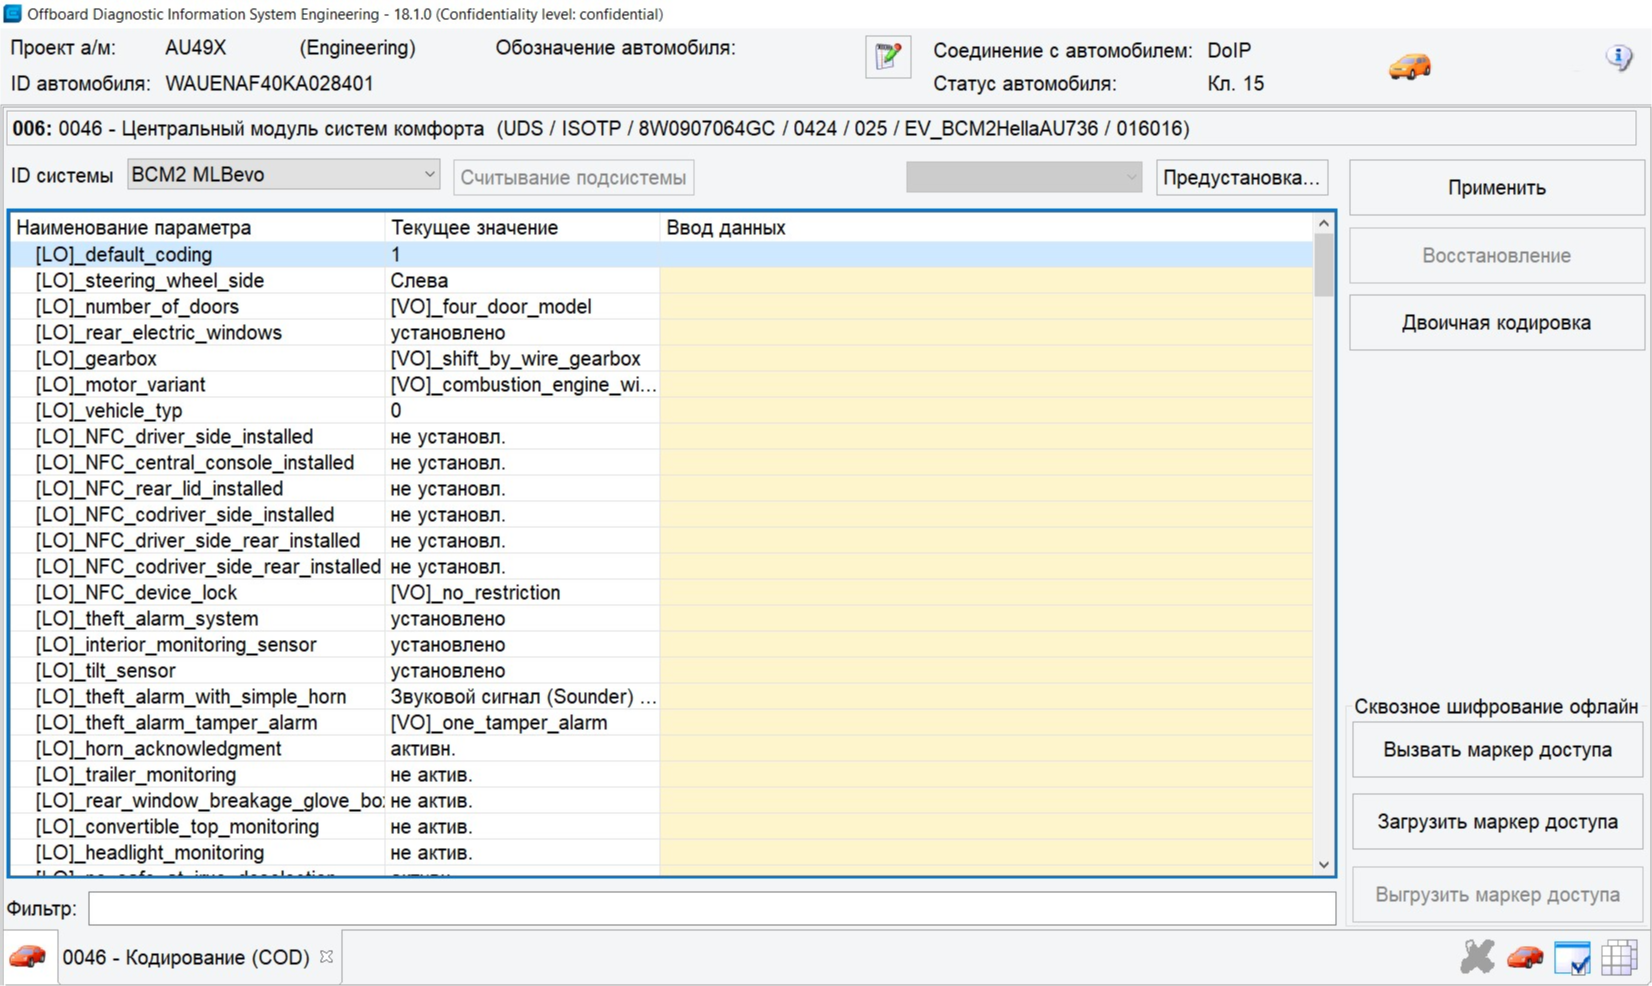
Warning
Incorrect coding can cause systems to behave wrongly. Always note original values or back up before changing anything.
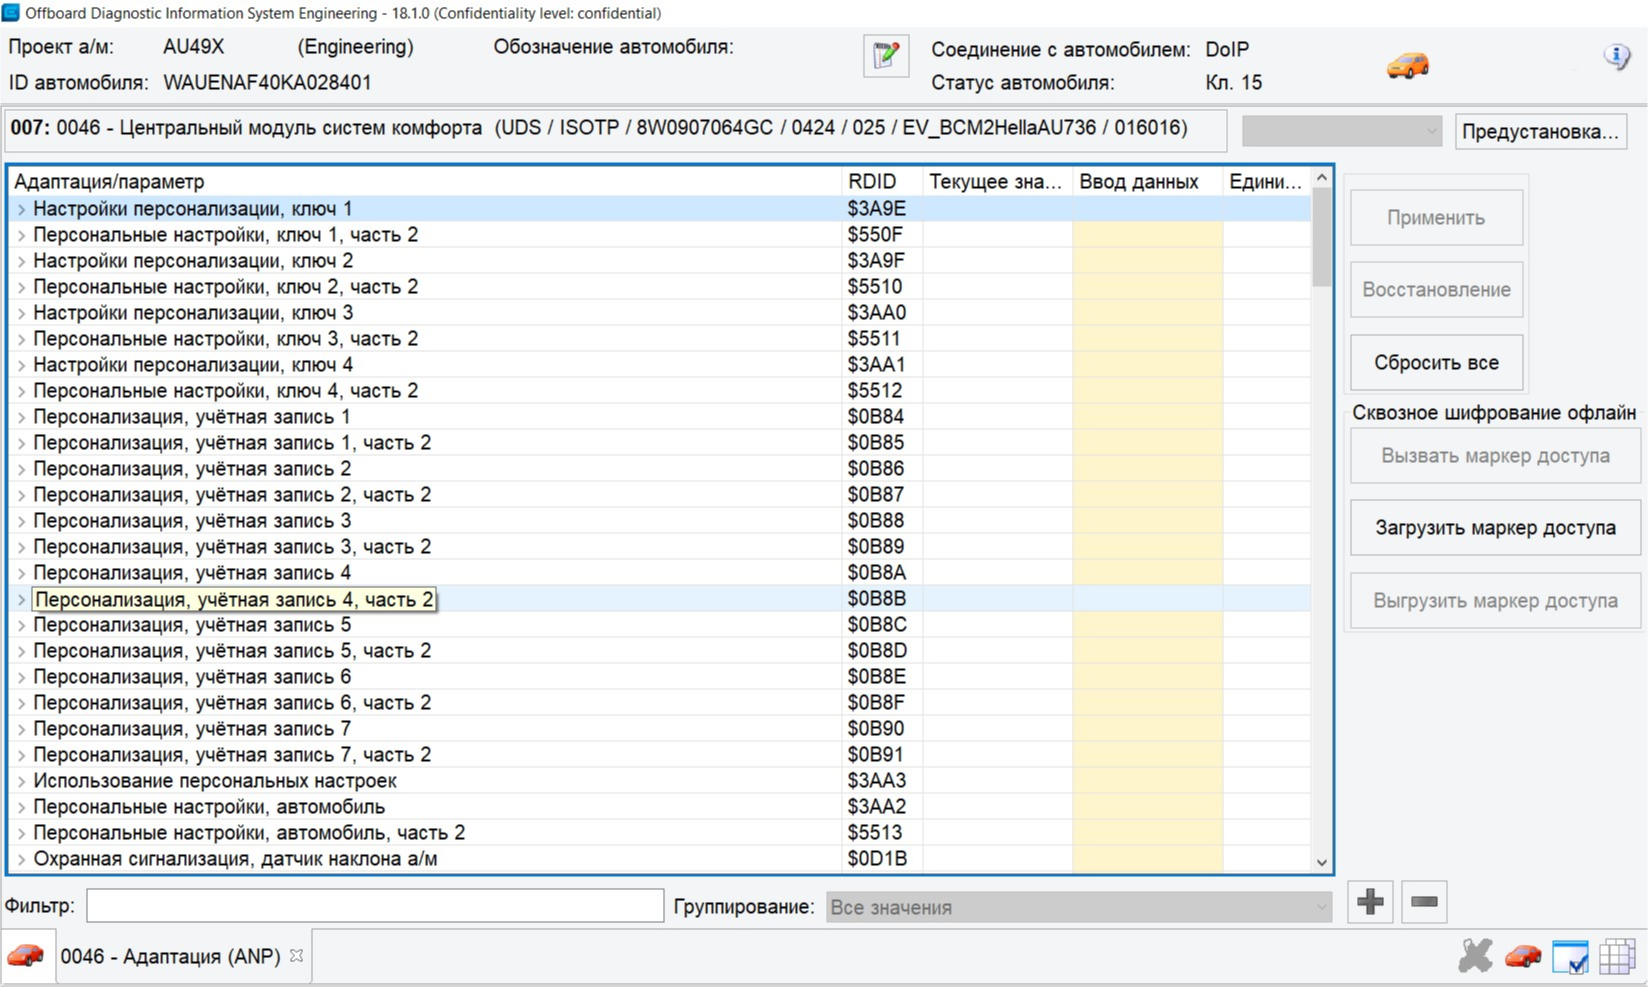
007 — Adaptation
Similar to coding but allows finer tuning with specific numeric values for various functions.
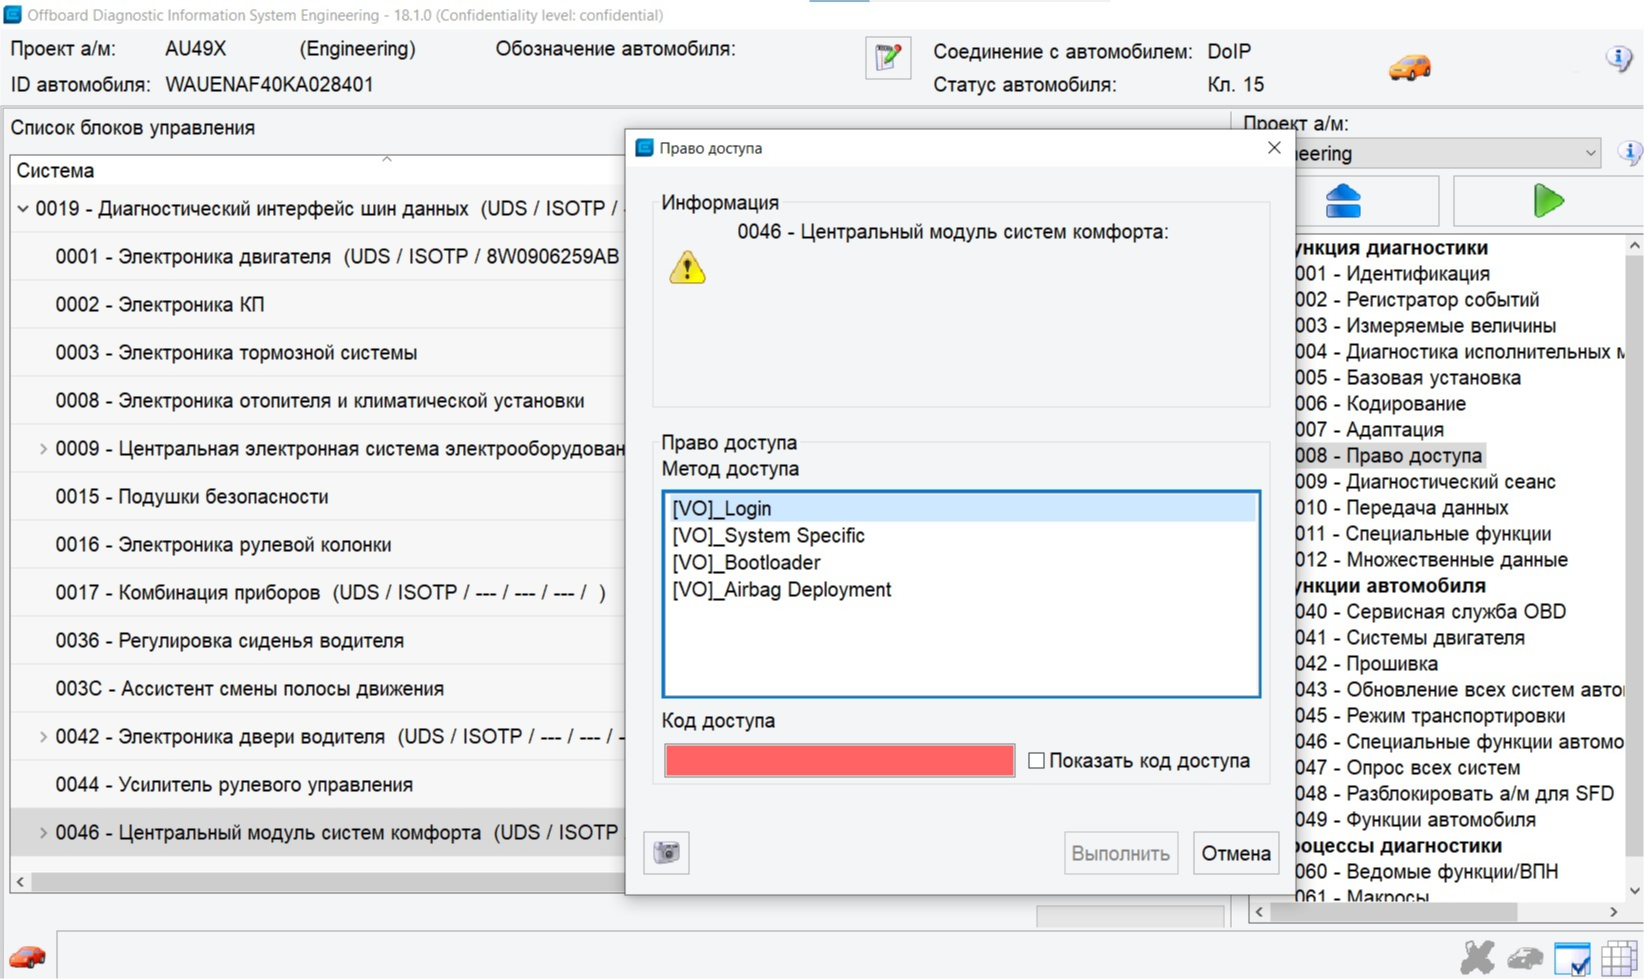
008 — Access authorization
Protected coding and adaptation settings require an access code. Without the correct code entered here, changes cannot be saved.
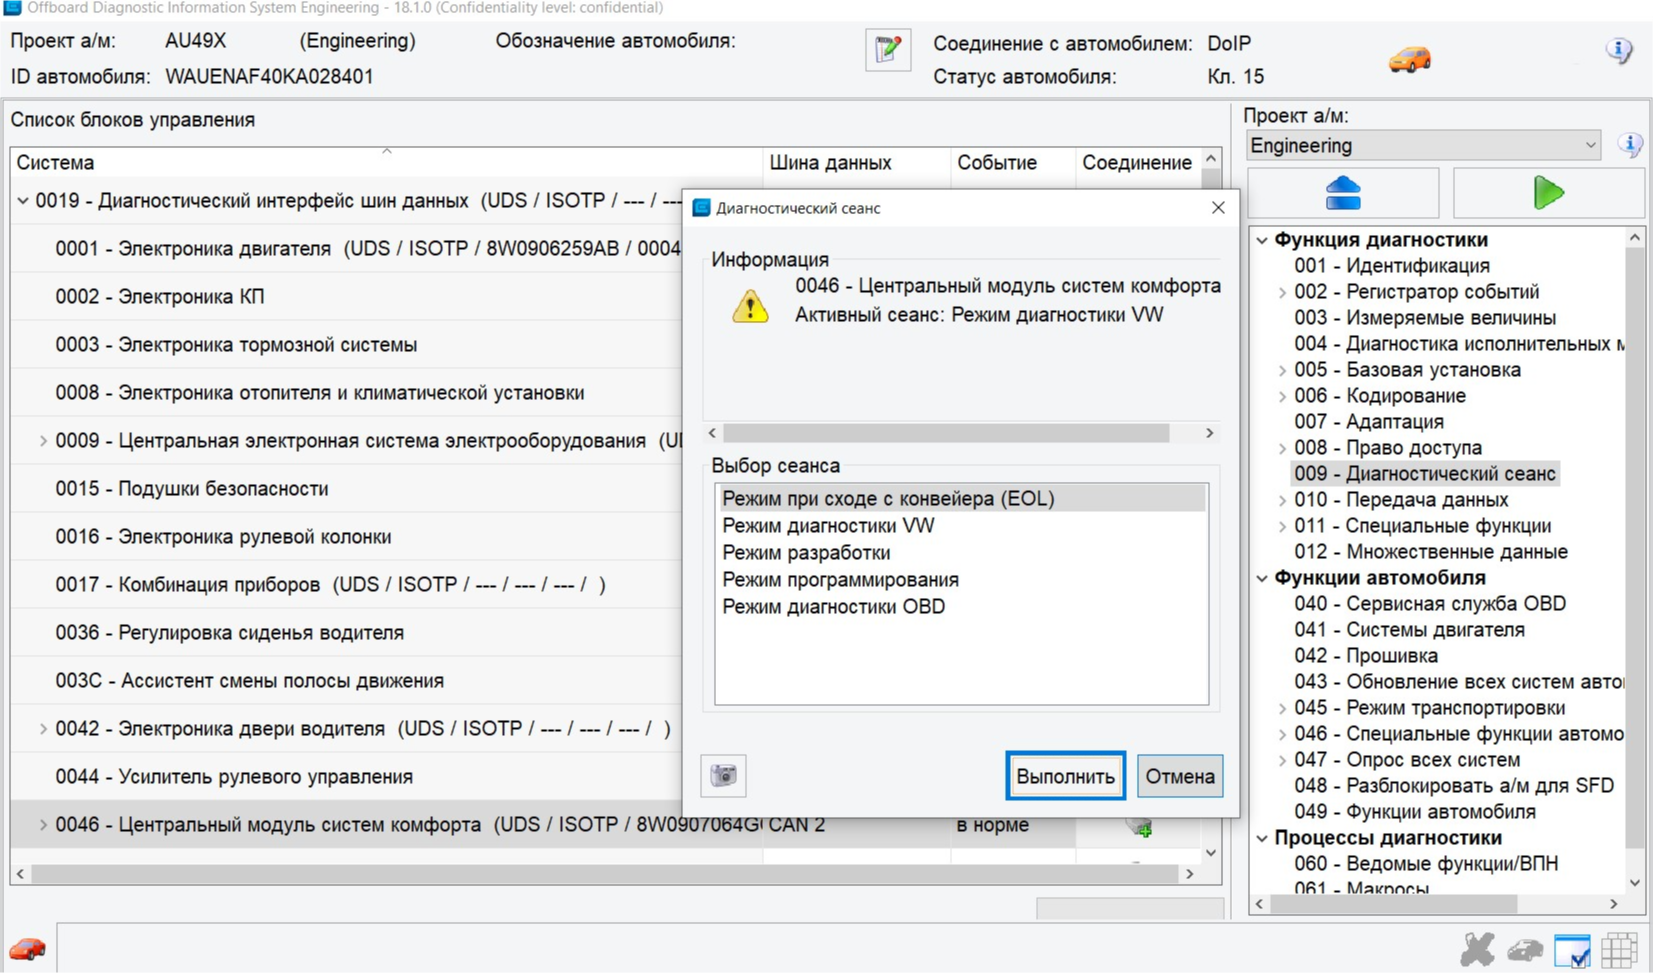
009 — Diagnostic session
Select access level when working with ECUs. Rarely used in everyday diagnostics. For example, development mode for a specific ECU is enabled here — useful when adaptation returns “Out of range” or “Function unavailable” (see section below).
010 — Data transfer
Write parameter datasets to ECUs. Data may be XML or a ZIP archive. Select the ECU, choose the file, then click Write data block.
Some ECUs also offer Memory cells — direct EEPROM access to view and edit cells.
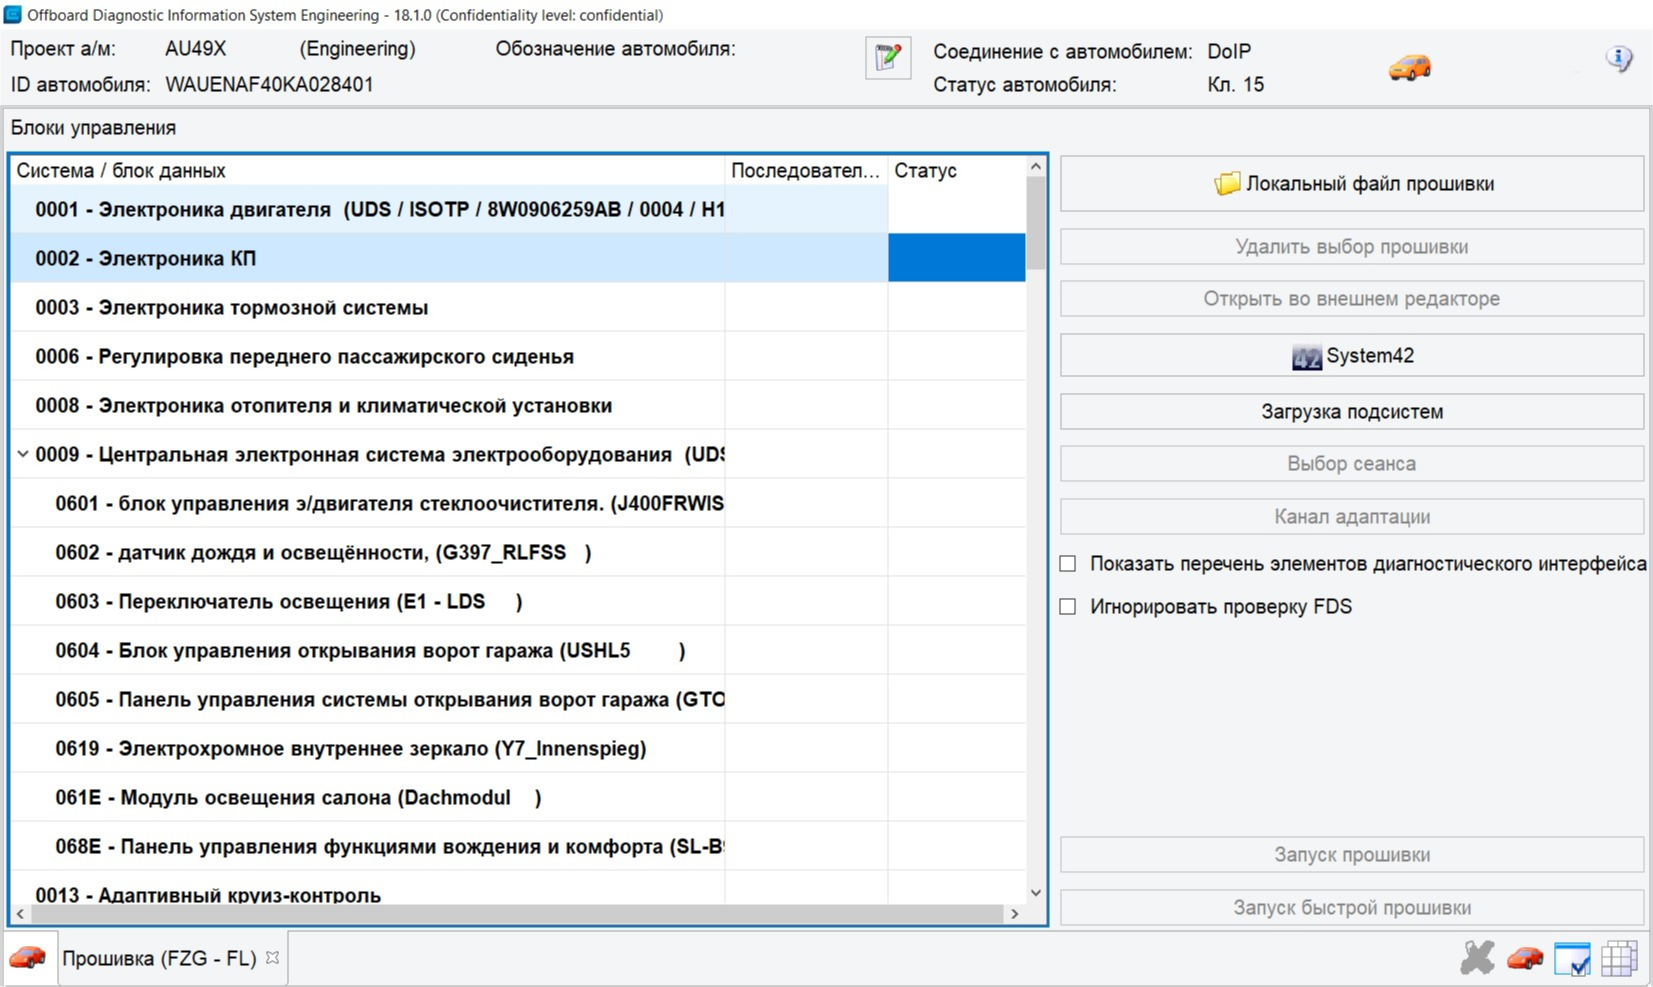
042 — Flashing
Update ECU firmware. Select the ECU, choose the new flash file, click Start flashing, and wait until the process completes. Follow the checklist in ECU software update beforehand.
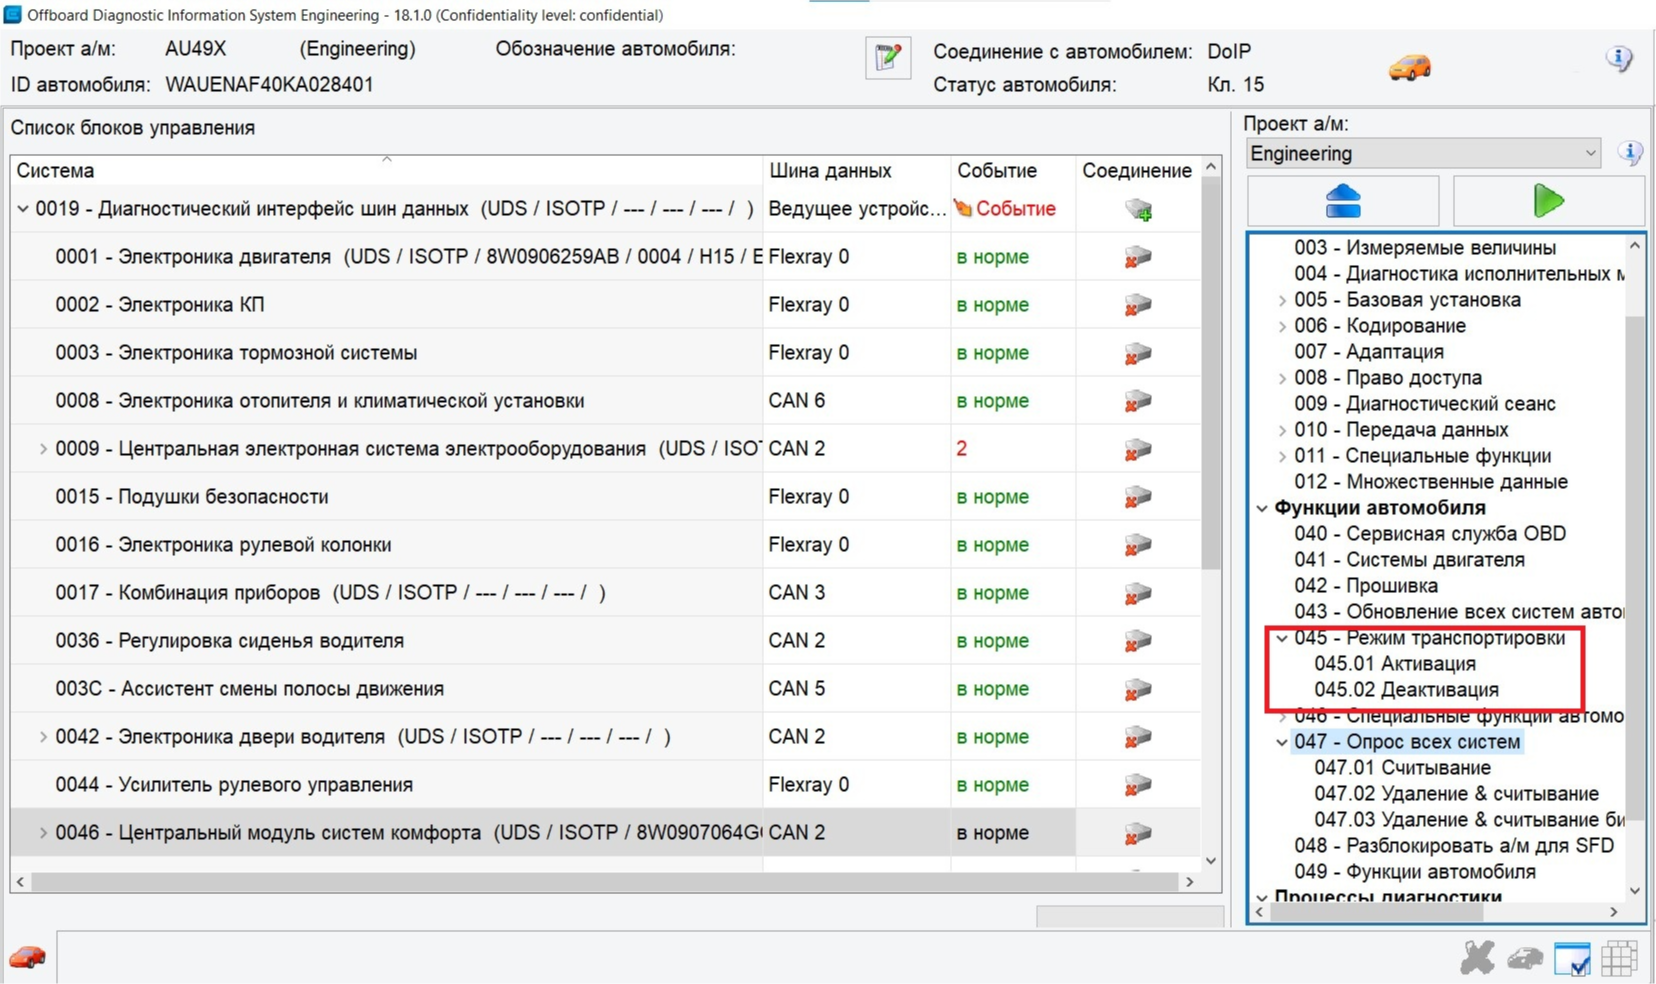
045 — Transport mode
Special mode for situations such as towing on a flatbed. Disables certain systems to save energy and avoid faults.
046 — Special vehicle functions
Very important section. Create a backup of all codings and adaptations on the vehicle.
Tip
Always save a backup before changing any ECU. Some ECUs may require a password. Step-by-step export: Export adaptations and codings.
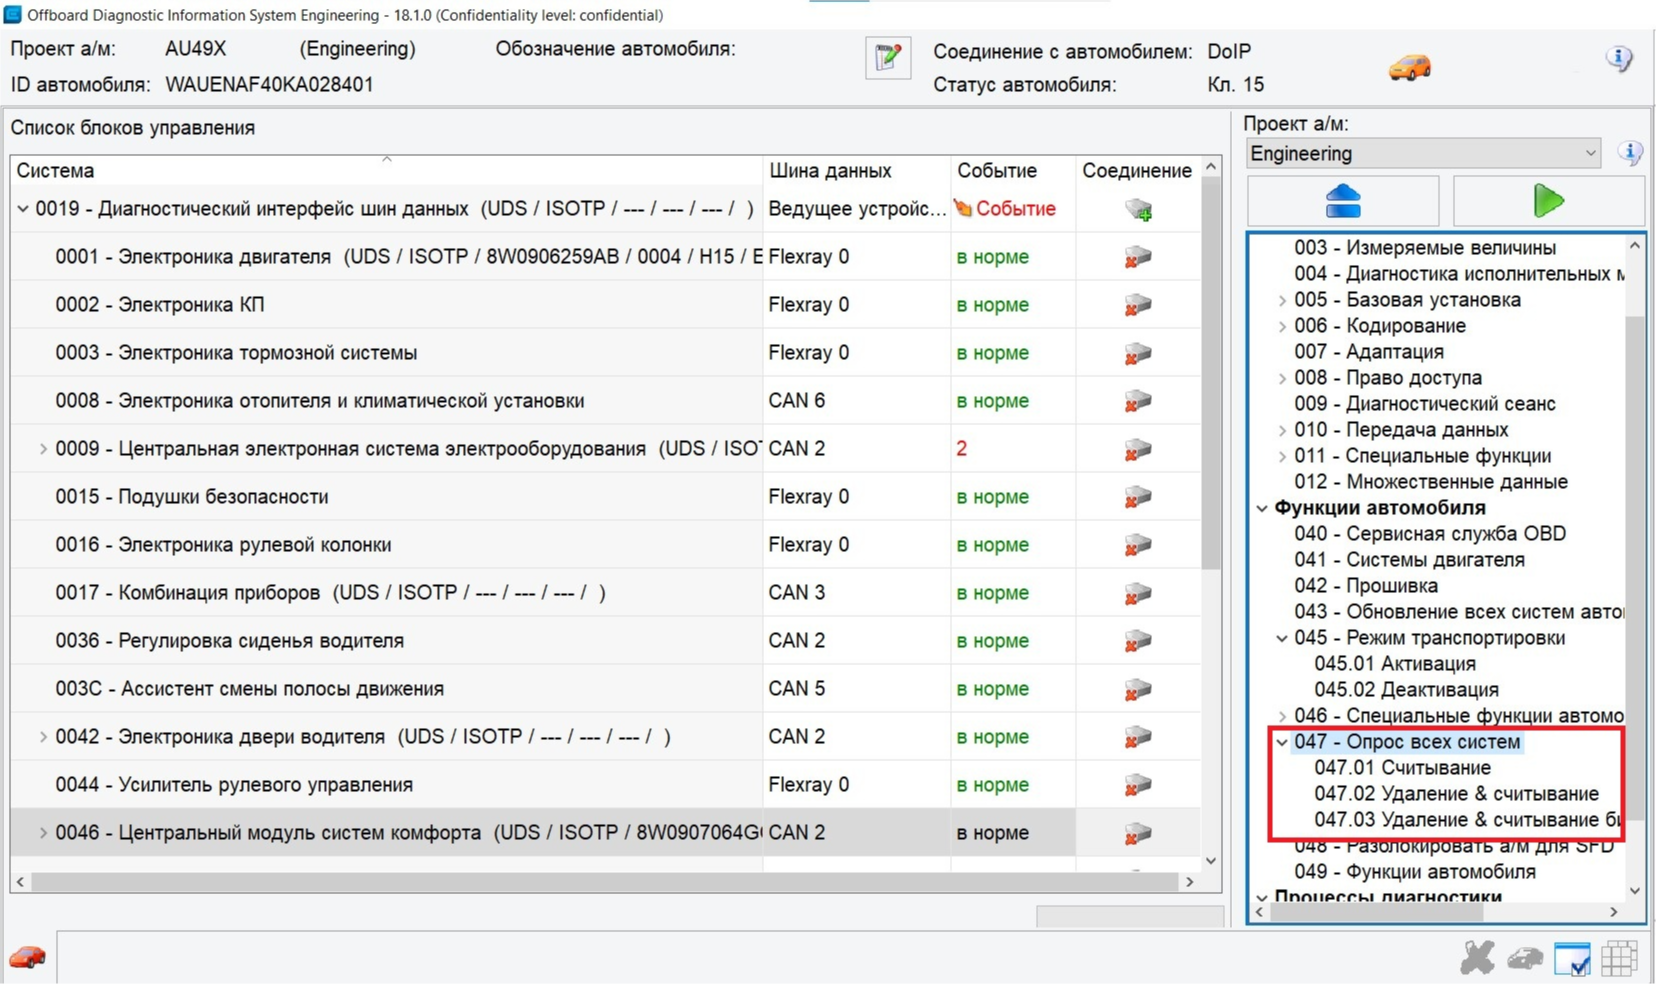
047 — Scan all systems
Global diagnostics: read or clear faults in all ECUs with one action. Useful for finding permanent (non-clearable) faults.
048 — Unlock ECU for SFD
Work with SFD — a protection system introduced on VAG Group vehicles from around 2020. Grants temporary access to protected ECUs for service work. See SFD.
049 — Vehicle functions
Activate or deactivate paid options and features pre-installed by the manufacturer but initially locked for the user.
Note
Some ODIS E menu items are intentionally omitted here; they are advanced professional functions and not required for basic understanding of the system.
Practical ODIS Engineering notes
Explanation of parameters
- LN, LO, SO, SN – parameter (L – long, S – short)
- VO, VN – table of parameters (V – volume)
- VN – value (V – value)
Names, values, and units for text identifiers from ODX data use the corresponding text from the CS dictionary.
If the parameter/section name is in the language dictionary installed in ODIS Engineering,
the value shows the letter N (Normalized) and the name is translated:
- [SN, LN, VN] name_from_dictionary
If the name is not in the language dictionary, information comes directly from ODX data (letter O):
- [SO, LO, VO] name_from_ODX_data
Load the desired vehicle profile
- In ODIS S, start diagnostics (you do not need to wait for it to finish — only start the session)
- Save the diagnostic log
- Open it in a browser → Expand all → just below the start of the log you will see the project name for this vehicle
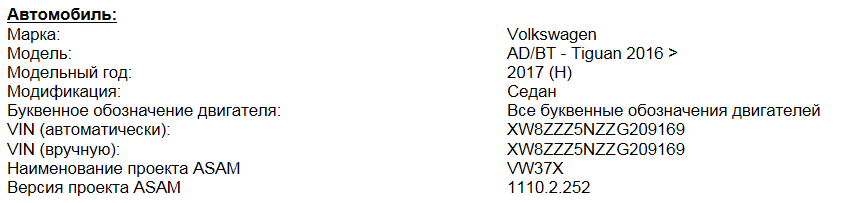
Look for: ASAM project name
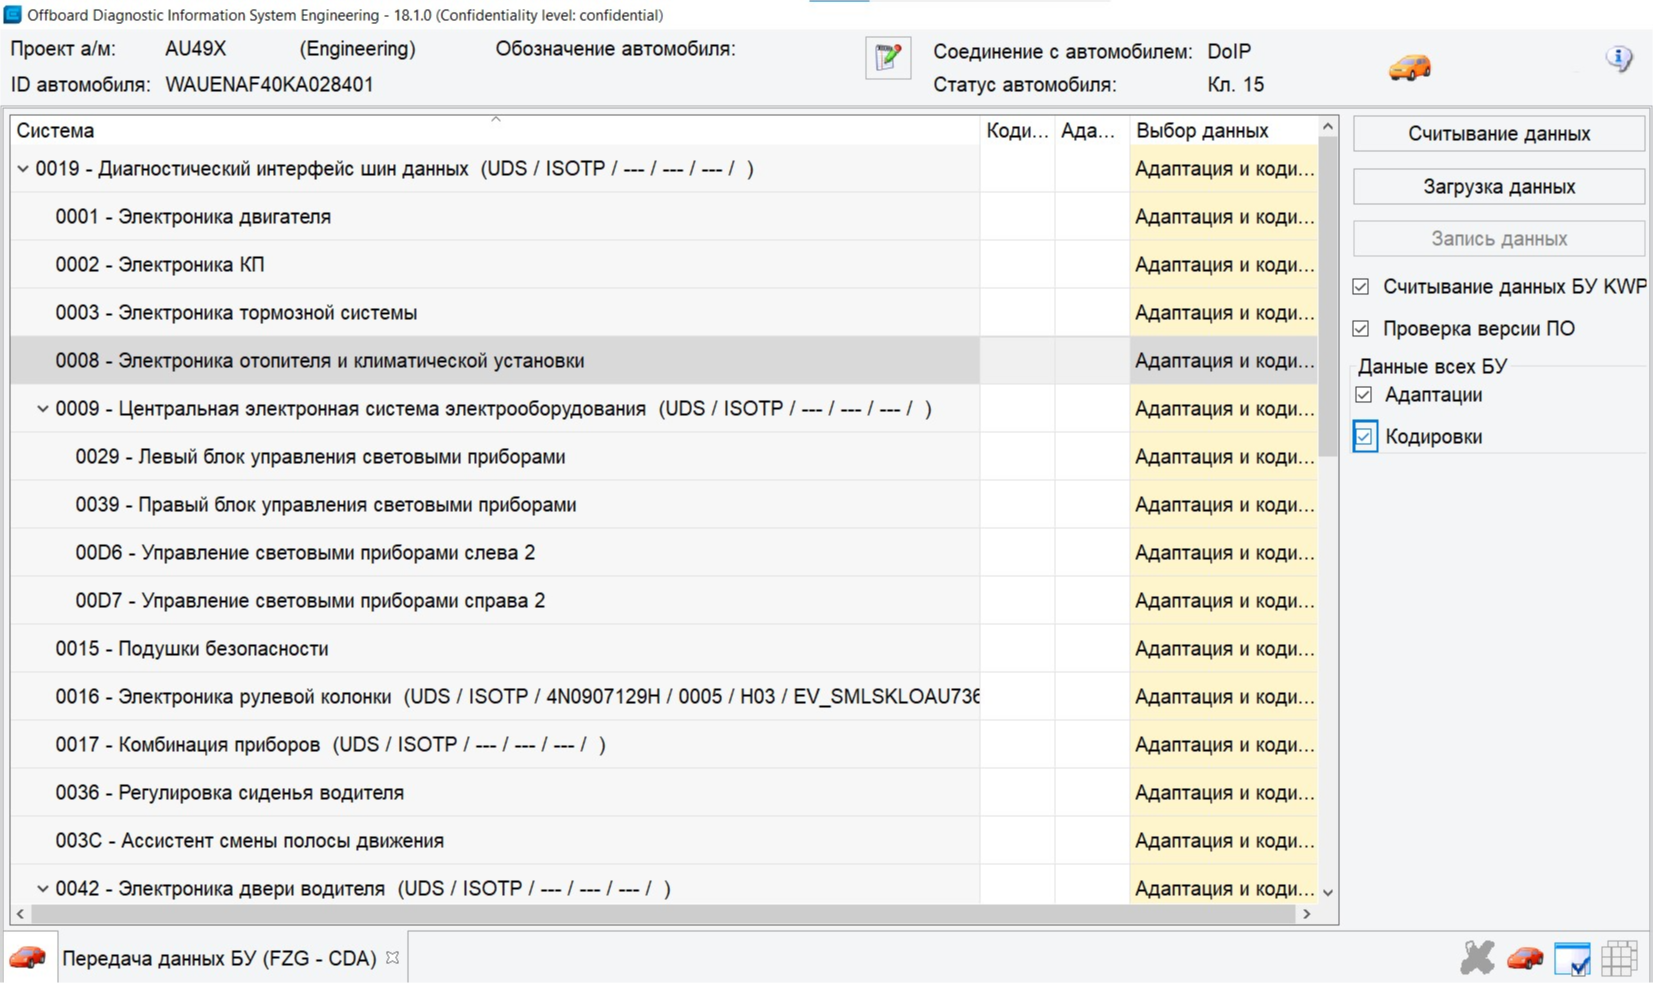
Export adaptations and codings
- Vehicle services, sub-item 046 — Special vehicle functions (Fzg. Sonderfunktionen)
- Select the desired ECU.
- Check Adaptation and Codings, click Read data
- Choose a path and save.
Some ECUs may ask for passwords (logins). When scanning finishes, the logs are saved to the chosen folder.
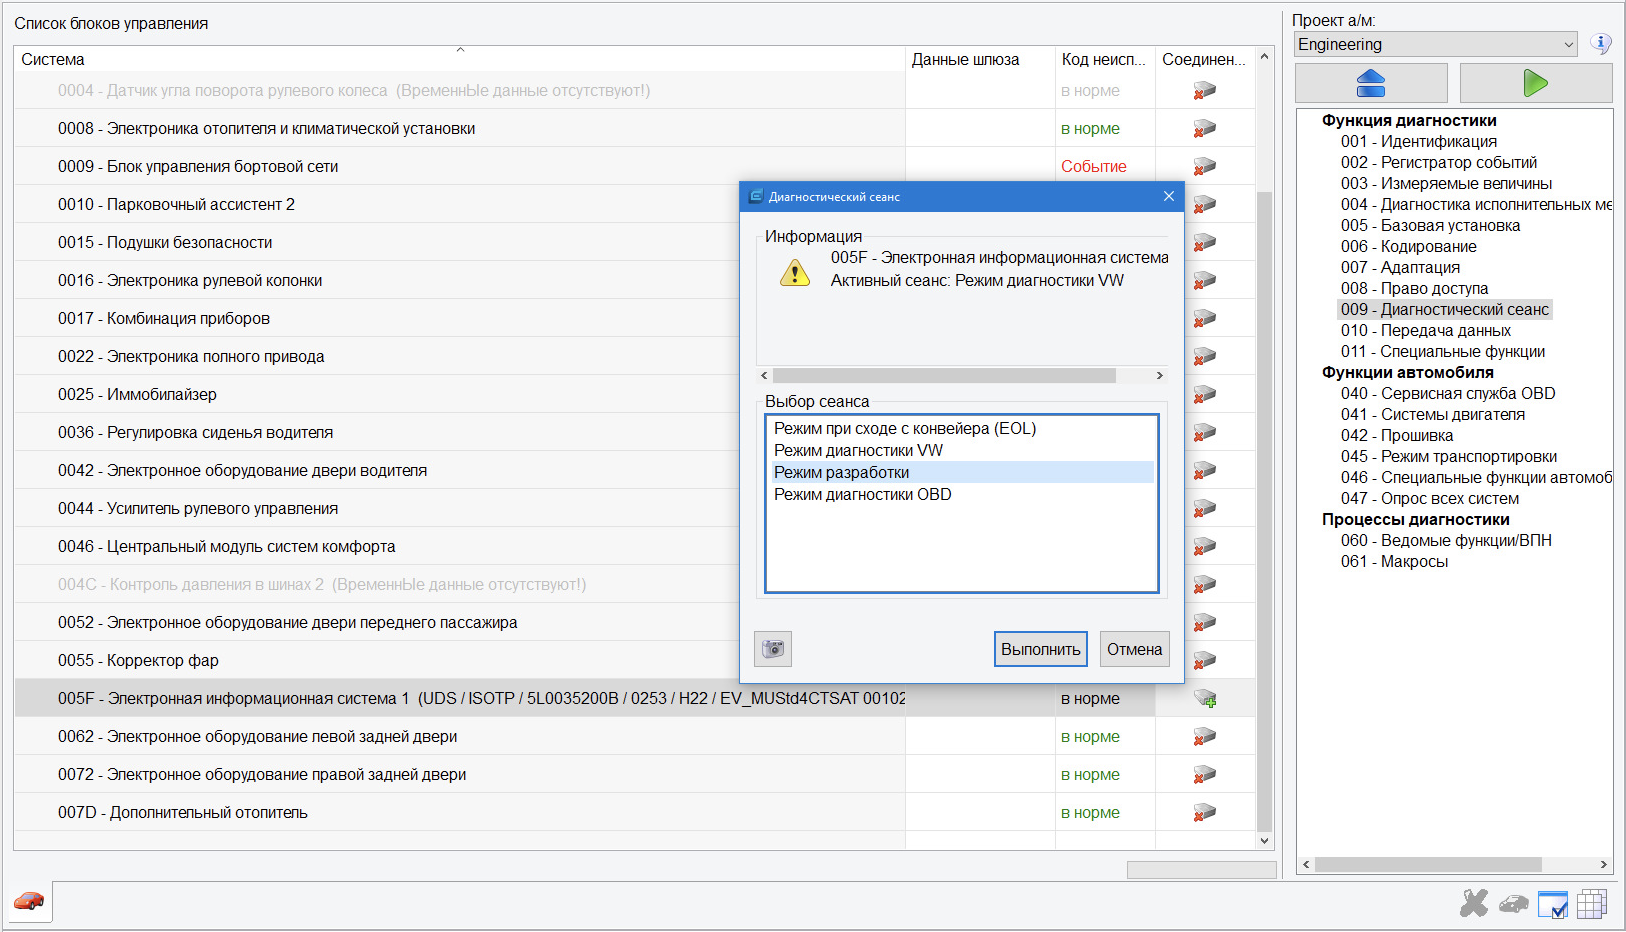
Activate development mode
When enabling certain adaptations you may see Out of range or Function unavailable.
In most cases, enable development mode in the diagnostic session for that ECU:
Saving presets
- Open the desired ECU (adaptation or coding)
- Select the item ([VO], [VN]), expand it with the arrow on the left (>)
- Click Preset in the upper right
- In the menu, choose New and give it a name
- In the same Preset menu, choose Export and select where to save
Import presets via Preset → Import.
Delete a preset with Delete event in the same menu.
Loading parameters
- Select the desired ECU
- Item 010, sub-item 010.01 “Download data”
- Select the file and start the upload
ECU software update
Before updating software:
- Connect a battery charger to the vehicle battery
- Turn off unnecessary electrical loads (ventilation, seat heating, interior lights, etc.)
- Use a cable between the adapter and the vehicle. Bluetooth© connections may interrupt the update
- Disconnect third-party devices (phones, external drives) and remove the SIM card from the head unit
- Keep the driver’s door open during the update
- Turn on hazard warning lights so the vehicle-side CAN bus stays active